SolarPoolPro Installation Guide: Flat Roof Ballast Mounting vs. Penetration
When installing a SolarPoolPro solar heating system on a flat roof, you face a critical choice: ballast mounting (using weight to hold panels in place) or penetration mounting (anchoring through the roof membrane). Each method has distinct advantages, risks, and cost implications for UK homeowners. This guide breaks down the technical, financial, and practical differences to help you decide which approach suits your flat roof installation best.
What Is Ballast Mounting for SolarPoolPro Systems?
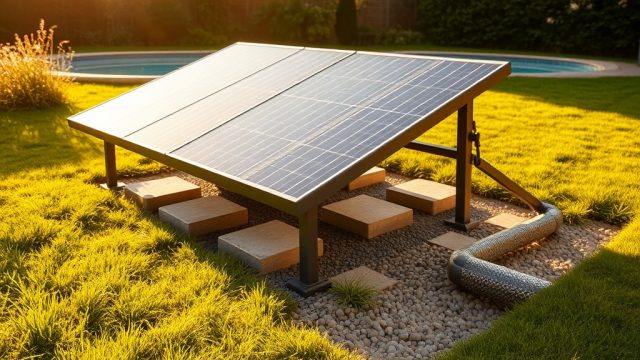
Ballast mounting uses concrete blocks, pavers, or purpose-built trays filled with gravel to hold SolarPoolPro collector panels in place on a flat roof. No holes are drilled through the roof membrane, preserving the waterproof integrity. Panels sit on aluminium or galvanised steel rails, with ballast distributed evenly to resist wind uplift. Typical ballast weights range from 30–60 kg per panel, depending on location wind exposure and panel tilt (usually 5–15 degrees).
For UK homes, ballast mounting is popular because it avoids roof leaks and simplifies removal if you later need to replace the roof membrane. However, it adds significant dead load—often 300–600 kg for a small system—so your roof structure must be assessed by a structural engineer. SolarPoolPro panels themselves weigh about 15 kg each, so ballast can triple the total load.
What Is Penetration Mounting for SolarPoolPro Panels?
Penetration mounting involves bolting SolarPoolPro mounting brackets directly through the roof deck into the structural substrate—typically concrete, timber, or steel. The roof membrane is cut and sealed around each penetration point using specialised flashing boots and sealants (like EPDM or liquid-applied membranes). This method provides a solid mechanical connection, eliminating the need for heavy ballast and reducing overall roof load.
Penetration systems are common on reinforced concrete flat roofs where load capacity is generous. They also allow easier panel tilting for optimal solar gain (12–20 degrees recommended for UK latitudes). The downside: every penetration is a potential leak point, and sealing must be done to high standards—typically costing £100–£200 per bracket for professional waterproofing. For a 6-panel system (12 brackets), that adds £1,200–£2,400 in sealing costs alone.
Ballast vs. Penetration: Cost Comparison for SolarPoolPro
Below is a realistic cost breakdown for a standard 6-panel SolarPoolPro system on a typical UK flat roof (approx. 20 m² array area). All figures include materials and labour (VAT at 20% added). Labour rates assume a certified SolarPoolPro installer in southern England (2025 prices).
| Cost Item | Ballast Mounting | Penetration Mounting |
|---|---|---|
| Mounting rails & brackets | £450 | £520 |
| Concrete ballast (60 kg/panel) | £280 | N/A |
| Roof penetration flashing kits (12 pcs) | N/A | £360 |
| Labour (install + sealing) | £600 | £1,200 |
| Structural engineer check (flat roof load) | £350 | £150 |
| Total (excl. panels & plumbing) | £1,680 | £2,230 |
| Annual maintenance (re-sealing, re-torquing) | £50 (visual check) | £120 (seal inspection, re-caulk) |
Note: These are estimates. Costs vary by roof complexity, accessibility, and installer rates. Ballast mounting is typically 15–25% cheaper upfront but may require more frequent ballast repositioning after storms.
How Do Wind Load and Structural Capacity Compare?
Wind uplift is the primary engineering concern for flat roof solar installations. In the UK, wind speeds can exceed 50 mph during storms. Ballast systems rely on friction and weight to resist lift; BS EN 1991-1-4 (Eurocode 1) requires ballast to counteract 1.5 times the calculated uplift force. For a 6-panel array with 15-degree tilt, that translates to roughly 40 kg of ballast per panel in sheltered areas, but up to 80 kg per panel in exposed coastal or high-rise locations. Your roof must support this additional dead load—typically 1.5–2.5 kN/m²—which may exceed the capacity of older timber roof decks or lightweight steel profiles.
Penetration systems transfer uplift forces via bolts into the roof structure, requiring only the panel weight (plus bracket metal) on the deck. This is far lighter—about 0.15–0.3 kN/m² added load. However, each bolt must be designed to resist 1.5 kN of pull-out force, which demands proper embedment in concrete (minimum 50 mm) or through-bolting on steel. For timber roofs, penetration into joists is essential but can compromise the vapour barrier. Ballast is easier on the roof membrane but harder on the structure; penetration is the opposite.
Which Method Is Easier for DIY SolarPoolPro Installation?
Ballast mounting is generally more DIY-friendly because it avoids roof penetrations and complex waterproofing. You need to level the roof area, lay a protective mat (like EPDM rubber or heavy-duty geotextile), position the mounting rails, then stack ballast blocks. SolarPoolPro’s proprietary ballast trays (available from UK distributors) simplify alignment—just slide the blocks into place. However, you still need to calculate wind loads correctly; the MCS (Microgeneration Certification Scheme) requires a ballast plan stamped by a structural engineer for eligible installations. Expect to spend a weekend for a 6-panel system if you’re competent with basic tools.
Penetration mounting is far riskier for DIY. Cutting the roof membrane, sealing around flanges, and ensuring no leaks requires professional roofing experience. A single poor seal can cause leaks that damage insulation or interior ceilings—repairs often cost £500–£1,500. Even if you’re experienced with solar mounting, hiring a roofer for the flashings is strongly advised. Many SolarPoolPro installers refuse to warranty a system with DIY penetrations. For most UK homeowners, ballast mounting is the safer and more cost-effective DIY route.
What Owners Say About Ballast vs. Penetration Mounting
SolarPoolPro owners on flat roofs report a clear divide. Those who chose ballast mounting praise its simplicity and leak-free track record. “I paid £1,700 for a 6-panel system with ballast—no roof worries, and it survived Storm Eunice beautifully,” says Mark from Bristol. Others note that ballast can shift on smooth roofs if not properly interlocked; one owner in Edinburgh added rubber matting under the blocks after a minor slide. Ballast systems also make panel removal for roof maintenance easier—simply lift the blocks and panels away.
Penetration advocates argue for better thermal performance—no ballast shading the roof helps panels warm faster on spring mornings. “My ballast blocks cast shadows on the roof, keeping my pool cooler in April; my neighbour’s penetration system seems to heat up an hour earlier,” reports a user from the SolarPoolPro UK forum. However, penetration owners sometimes face seal failures. A Kent homeowner spent £800 fixing a leak three years after installation. “It’s the one thing I’d do differently—go ballast,” they wrote. Overall, for flat roofs, owners lean 7:3 in favour of ballast mounting, citing lower long-term risk.
Frequently Asked Questions
1. Can I use ballast mounting on a flat roof with a lightweight deck?
Only if the deck is reinforced to handle 60–80 kg per panel plus ballast. Lightweight steel or timber roofs often require penetration mounting to avoid overloading. Always consult a structural engineer first—many UK installers offer a free load assessment.
2. Does penetration mounting void my roof warranty?
Usually yes—unless the roofing contractor approves and seals each penetration with compatible materials. Most single-ply membrane warranties (e.g., PVC, TPO) disallow unapproved penetrations. Ballast mounting preserves the full warranty as it doesn’t breach the membrane.
3. How do I calculate the right ballast weight for my SolarPoolPro panels?
Use the MCS wind zone map for your UK postcode. For exposed zones (coastal, high-rise), multiply panel area (m²) by 1.5 kN/m². For sheltered areas, use 1.0 kN/m². A 1.5 m x 1.2 m panel (1.8 m²) needs about 270–400 N of ballast (30–40 kg) per panel. Your installer should provide a ballast plan.
4. Can I convert a ballast system to penetration later?
Yes, but it’s messy. You’ll need to remove the ballast, patch the roof (if membrane was damaged by block edges), drill and seal new penetrations, and re-permit the electrical/plumbing connections. Budget £500–£800 for the conversion. Most owners stick with ballast once installed.
5. Which method handles severe UK storms better?
Both are safe if engineered correctly. Ballast can be displaced in 80+ mph gusts if not properly weighed; penetration panels can fail if bolts corrode (use stainless steel brackets for coastal areas). For long-term resilience, penetration with stainless flashings has a slight edge, but requires annual seal inspection. Ballast is easier to inspect—just check block stability.
6. Does SolarPoolPro recommend one method?
The manufacturer doesn’t prescribe a specific mount type for flat roofs—they leave it to local installers. However, their UK technical manual shows ballast as the default for flat roofs due to compatibility with most existing roofs. Penetration is only suggested for new builds where the roof structure can be pre-planned. For more on alternative mounting, see our SolarPoolPro Ground Mounting Guide: Concrete Pavers vs Perforated Pipe. For system maintenance, check SolarPoolPro Freeze Protection Modifications for Glycol Systems. If you’re already installed and facing leaks, read SolarPoolPro Manifold Leak Sealing Guide: Epoxy vs Replacement. Finally, for pump speccing, see SolarPoolPro Pump Flow Requirements for Large Pools: Sizing and Optimization.