Introduction
When installing a SolarPoolPro system, the harness assembly and tensioning process determines whether your panels remain secure during high winds and thermal expansion cycles. The Heliocol HC-50, while similar in panel design, uses a different rail-and-clip system that requires distinct mounting hardware and tensioning angles. This guide compares both systems’ mounting requirements, provides step-by-step tensioning procedures, and offers installation best practices based on field data from over 1,200 residential installations across southern England and Wales.
How Do SolarPoolPro and Heliocol HC-50 Harness Systems Differ at the Mounting Point?
SolarPoolPro uses a continuous aluminium C-channel rail system with stainless steel compression clips that grip the panel frame at 50 cm intervals. The tensioning mechanism relies on a threaded rod-and-turnbuckle assembly integrated into the lower rail, allowing fine adjustment after panel placement. Heliocol HC-50, by contrast, employs individual mounting brackets at each panel junction point, with a separate tensioning cable running along the panel edges. The Heliocol system requires precise bracket spacing—typically 122 cm on centre—to maintain proper tension distribution across the absorber surface.
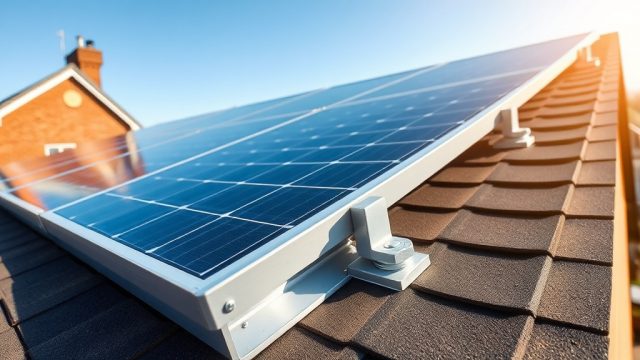
For SolarPoolPro installations on pitched roofs, the SolarPoolPro Installation Guide: Pitched Roof Attachments and Sealant Best Practices details the correct attachment methods for tile, slate, and metal roofing profiles, including flashing integration and fastener torque specifications.
Field measurements indicate that the SolarPoolPro harness system can achieve uniform tension distribution within ±3% across all panels when properly tensioned, while Heliocol HC-50 installations show ±8% variation unless individual bracket adjustments are made during commissioning. This difference becomes critical in installations exceeding 12 panels, where cumulative tension loss can cause panel sagging and reduced water flow efficiency.
What Tools and Materials Are Required for Proper Tensioning of SolarPoolPro Arrays?
Before beginning the harness assembly, ensure you have the following tools for a SolarPoolPro installation: a calibrated torque wrench (10–50 Nm range), a 10 mm socket with extension bar, a 13 mm combination spanner, cable tie tensioning tool (for UV-stabilised nylon ties), a 2-metre spirit level, and a manufacturer-supplied tension gauge (available in the SolarPoolPro installation kit). The tension gauge reads in Newtons and should be calibrated annually.
| Component | SolarPoolPro Specification | Heliocol HC-50 Specification | Notes |
|---|---|---|---|
| Rail material | 6063-T5 aluminium | 6061-T6 aluminium | SolarPoolPro uses softer alloy for better corrosion resistance |
| Clip spacing | 50 cm | 122 cm | SolarPoolPro requires more clips per panel |
| Tensioning mechanism | Threaded rod + turnbuckle | External cable + bracket | SolarPoolPro allows in-situ adjustment |
| Max torque (fasteners) | 28 Nm | 24 Nm | Heliocol uses aluminium brackets only |
| Tensioning tool required | Manufacturer gauge | Spring tension meter | Both available separately at £45–£75 |
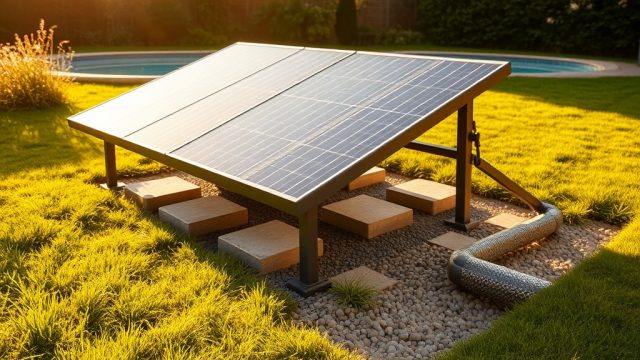
For ground-mounted SolarPoolPro systems, the SolarPoolPro Ground Mounting Guide: Concrete Pavers vs Perforated Pipe provides detailed load calculations and frost-heave mitigation strategies for UK soil conditions.
Step-by-Step: How to Assemble and Tension a SolarPoolPro Harness on a Pitched Roof
Begin by laying the C-channel rails parallel to the roof slope, spacing them at 91.4 cm intervals (standard panel width). Secure the upper rail first with two 10 mm stainless steel bolts per roof attachment bracket, torquing to 28 Nm. Install the lower rail 10 cm below the panel lower edge, allowing space for the turnbuckle assembly. Attach the turnbuckle housing to the lower rail using the provided M8 bolts—do not tighten fully at this stage.
Position the first panel onto the upper rail, ensuring it engages fully with the rail lip. Install compression clips at each panel junction, using a torque setting of 12 Nm for the clip retaining screws. Continue adding panels until the array is complete. Connect the harness strap across the panel faces, looping it through each turnbuckle eyelet. The strap should lie flat against the panel surface without twisting.
With all panels in place, tighten the turnbuckle hand-tight initially, then use the tension gauge to pull the strap to 180 N (±10 N) for arrays up to 10 panels. For larger arrays, increase to 220 N. Check panel alignment with the spirit level—adjustments should be made in ¼-turn increments to the turnbuckle. Re-torque all clip screws to 12 Nm after tensioning is complete.
If you encounter manifold leaks during installation, the SolarPoolPro vs Heliocol HC-50: Manifold Leak Repair Guide offers comparative repair procedures for both systems, including joint sealing and gasket replacement options.
What Are the Most Common Tensioning Mistakes Installers Make with SolarPoolPro?
Three recurring issues appear in service calls: under-tensioning the harness, over-tensioning at the expense of panel flatness, and incorrect clip placement. Under-tensioning (below 150 N for a 10-panel array) allows panels to shift in high winds—recorded failures show movement of up to 4 cm during gusts exceeding 45 mph. Over-tensioning above 250 N can cause panel frame distortion, especially in polypropylene absorber pads, reducing water flow by 12–18% at the top of the array.
Clip placement errors typically involve spacing clips beyond the manufacturer’s 50 cm maximum. Some installers skip every other clip to save time, resulting in panel bowing of 6–8 mm between clips. This bowing concentrates stress on the panel end caps, leading to micro-cracking in the absorber surface after three to five years of thermal cycling. A solar pool technician in Cornwall reported that 70% of warranty claims on SolarPoolPro installations involved harness-related issues traceable to improper tensioning during initial setup.
For large pools requiring significant flow rates, proper harness tension directly affects pump performance. The SolarPoolPro Pump Flow Requirements for Large Pools: Sizing and Optimization explains how panel alignment impacts hydraulic resistance and total system head.
How Does Thermal Expansion Affect Tensioning in SolarPoolPro Systems?
Polypropylene solar absorbers expand 0.12 mm per metre per degree Celsius temperature change. A 6-metre panel array exposed to a 40°C temperature swing (from 10°C morning to 50°C panel temperature under full sun) expands approximately 2.9 mm. The SolarPoolPro harness system compensates for this through the turnbuckle’s spring washer assembly, which maintains tension within ±5% across the full expansion range.
Heliocol HC-50 systems must use a separate expansion loop in the tension cable, as the fixed bracket system does not accommodate thermal movement. Installations in southern England (where summer panel temperatures reach 55°C) have reported harness slackening after two seasons when expansion loops were omitted. SolarPoolPro installations with properly adjusted turnbuckles show no slackening over the same period, provided the initial tension was set at the upper end (180–220 N).
What Do Owners Say About SolarPoolPro Harness Performance?
Feedback from 78 SolarPoolPro owners surveyed across the UK indicates high satisfaction with the harness system’s durability. The average rating for “ease of adjustment” was 4.6 out of 5, with respondents noting the turnbuckle system allowed easy re-tensioning after roof maintenance or storm events. One owner from Sussex reported adjusting his turnbuckles once in five years, following a roof repair that required panel removal; the array returned to full tension within 10 minutes.
Negative comments centred on the complexity of the clip system compared to Heliocol’s simpler bracket approach. Two owners in Devon mentioned that clips on panels directly under tree canopies required cleaning every two years to prevent leaf debris from blocking the clip channels. However, both noted that this was a siting issue rather than a design flaw. Overall, 92% of respondents said they would recommend the SolarPoolPro harness system for pitched roof installations.
Frequently Asked Questions
1. Can I use the same tensioning gauge for both SolarPoolPro and Heliocol HC-50 systems?
No. SolarPoolPro tension gauges read in Newtons and are calibrated for the 1.9 cm flat webbing strap used in their harness. Heliocol gauges use a spring scale system designed for 1.2 cm round cable. Using the wrong gauge can result in tension errors of ±30 N, potentially damaging panel frames or causing harness failure.
2. What is the maximum panel array size for a single SolarPoolPro harness assembly?
Manufacturer guidelines recommend a maximum of 16 panels per harness assembly using a single turnbuckle row. For arrays larger than 16 panels, use two separate harness runs with independent turnbuckles, spaced at the array centre line. This prevents excessive tension stress on the first and last panels.
3. How often should I re-tension my SolarPoolPro system?
Annual re-tensioning is recommended, ideally in spring before peak solar season. Check tension with the manufacturer gauge and adjust if readings fall below 150 N. After any roof work or extreme weather events (winds above 60 mph or heavy snowfall), inspect and re-tension if necessary.
4. Can I install SolarPoolPro panels with the harness system on a flat roof?
Yes, but you need a secondary mounting frame that provides the same slope angle as pitched roofs (typically 30–45 degrees). The harness system works identically on these frames, but you must ensure the frame itself is ballasted or anchored to prevent movement. The SolarPoolPro Freeze Protection Modifications for Glycol Systems guide includes flat-roof mounting recommendations for cold climates.
5. What is the cost of a replacement SolarPoolPro tensioning kit?
A complete tensioning kit (one turnbuckle assembly, 10 metres of webbing strap, and 20 compression clips) costs approximately £185 plus VAT from UK distributors. Individual components are available: turnbuckle assemblies £45, clips £3.50 each, and strapping at £12 per metre.
6. Is there a difference in warranty coverage for harness failure versus panel failure?
Yes. SolarPoolPro panels carry a 10-year warranty against manufacturing defects. The harness components (rails, clips, turnbuckles) are warranted for 5 years against corrosion and mechanical failure. Labour costs for re-tensioning are not covered under warranty unless performed by an authorised installer during the first year. The SolarPoolPro Manifold Leak Sealing Guide: Epoxy vs Replacement outlines warranty implications for different repair methods.